
 Publishing on Amazon is really easy. Promise. Here’s a step-by-step guide to help you do just that. Feel free to skip points that are obvious to you and jump to items you’re not sure about. And if you have any questions, just ask!
The absolute minimum you need to start publishing on Amazon:
- an Amazon KDP account
- a completed (or almost completed) book
- a book cover
- a book description
Everything else you can figure out on the way.
Update (June 2021): We’ve moved the section on how to format your ebook into its own post!
1. Register an account
To publish ebooks on Amazon, you have to register an account at http://kdp.amazon.com. For obvious (or not so obvious) reasons*, it’s best to create a separate publishing account from your normal purchasing/reviewing account.
*Obvious reasons being that Amazon has some kind of anti-competitive (?) rule in place where they discourage authors from reviewing books by other authors because they subscribe to the traditional-publishing-as-competition model instead of the new collaborative-indie-publishing model.

For now, click Kindle eBook and we’ll get started—we’ll look at creating a Paperback in a future post.
E-BOOK DETAILS
2. Language & Title

The default language is English. Amazon currently supports various languages, but not Chinese or Malay, unfortunately. If you write in Malay or Mandarin, check out publishing on E-Sentral.
Next, enter your book title. We’re taking these screenshots while setting up a pre-order for A Still, Small Voice, so you can see where stuff goes.
You don’t need to have a sub-title, but if you do, add that in the second line.
3. Series & edition

Only fill this section if you’re publishing a series. In our case, A Still, Small Voice is #4 in the North series, so we’ve filled in those details.
You can usually ignore Edition Number, unless you’ve made major changes to your ebook and are uploading a new version.

If you’ve just made minor changes, e.g. to fix typos, this doesn’t count as a new “edition.”
4. Author and contributors

This is where you enter your pen name (if you use a one) and any co-authors or contributors. A point to note is that the primary author that appears here must be the same as the name on your cover! In this sample, we acknowledge the cover designer of A Still, Small Voice. It’s “optional” but it’s a nice thing to do. Please do credit anyone who has contributed substantially to your book.
5. Description

Also known as your book blurb or back copy, this is the description of your book. Go to any Amazon book page or turn to the back of a paperback and you’ll find examples of what to write in your description. This short section (KDP allows you 4,000 characters—not words, characters) is what will help you sell your book. To write one, think about the books you’ve browsed and what made you decide to read them. Oftentimes, the cover attracts our attention, but it’s the description of the story clinches the final sale.
The main points to consider are:
- what is this book about?
- who is it for/who will like it?
For more tips, check out these articles:
- https://kindlepreneur.com/back-book-cover-blurb/
- https://www.thecreativepenn.com/2010/11/16/how-to-write-back-blurb-for-your-book/
- https://writerswrite.co.za/how-to-write-an-irresistible-book-blurb-in-five-easy-steps/
- https://selfpublishingadvice.org/how-to-write-a-blurb-for-a-self-published-book/
6. Publishing rights

This is basically to confirm that you wrote it and you have the right to publish it. If you’ve sold your book to some big publisher (yay you!) you probably don’t have the publishing rights to put it up on Amazon on your own anymore unless you negotiated that as part of your contract. (Your publisher will probably be looking into publishing their own ebooks that may or may not be on Amazon.) But since you’re looking at this as a guide to self-publishing, it’s probably safe to say you own all your publishing rights. Unless you stole your book from someone else (don’t do that).
7. Keywords & Categories

Think of all the words that you would associate with your book. Are there themes that you cover/address? These are what will be tagged to your book as “search words”. This means that if someone were to search for “short story about Dragons” A Still, Small Voice would most likely come up in the search.
Categories tell Amazon where to put your book. You can only select two, but Amazon will eventually sort them into more relevant categories or you can email them later to request specific categories.
8. Age range

This is mainly helpful if the books you’re writing are targeted at children, or if your books are adult-only. We usually leave this blank since it’s optional. If you do know the minimum age range and/or reading level (which you can estimate using Word), you can update it.
9. Release date

If you’re filling up this page with your book and cover ready, go ahead and select “I’m ready to release my book now.” This means that once you’ve uploaded everything and the book has passed Amazon’s automatic checks, then your ebook will be available for sale instantly**!
** usually within 72 hours, they say.
Even if you have everything ready, you don’t have to release your book immediately. You can set a release date (up to 90 days in the future) to allow you to work on things like marketing and promotion before your book goes live. You’ll also be able to direct people to the Amazon book page so that your fans can pre-order your book.
You DO need a manuscript file to upload, so uploading one that’s near-final is always the best option. A good time to set up a pre-order page is when your book is about 90% done. Meaning, you’re probably just proofreading it for the hundredth time or making final tweaks. Try not to do upload a book that is still undergoing heavy revisions because if you don’t update your file before the final date shown, your placeholder file is going to be sent out to your fans and that could potentially be disastrous.
A note to remember: Pre-order customers always pay the lowest price, so be fairly confident about your selling price before you set up a pre-order.
AND NOW YOU’RE FINALLY DONE WITH THE EBOOK DETAILS PAGE!!
Give yourself a pat on the back and get a nice drink before moving on to the next page. This is where you get to upload the book.
E-BOOK CONTENT
10. Uploading your manuscript

First step: DRM yes or no?
We prefer NO, because we tend to switch platforms! This is really up to your preference. Some people think that DRM helps stop piracy, but our opinion is that if people are desperate enough, they’re going to pirate anyway.
Select your formatted file, and click Upload eBook manuscript.
To check out how to format your file via Microsoft Word or Kindle Create, we’ve moved that section to this post here. You can also upload an e-Pub file (which you can create via Scrivener).
If you’re using pre-orders, Amazon will tell you when is the latest possible date that you can submit the final version of your book. AND THEY WILL EMAIL YOU CONSTANTLY ABOUT IT.
11. Cover

Covers are uber important and we recommend that you hire a cover designer to make you a pretty one. We’ve already commissioned a cover for A Still, Small Voice but it’s not ready yet, so we decided to play around with the cover creator to show you how it works.
If you really don’t have money to commission a cover, this is a cheap way to do a passable cover, but the templates are used so often that it does not distinguish your book from the millions out there. It also smacks of you being an amateur and a cheapskate. Not what you want. You want to do a professional book, right?
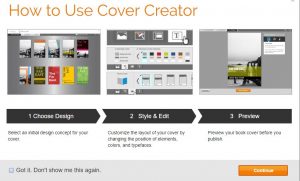

We decided not to upload a picture as we had none readily available. These were the options provided.


These templates are easily customiseable so just pick the options that appeal to you the most.
One great plus point with the cover creator is that if you have a picture/illustration/graphic you absolutely want to use on your cover but don’t have photoediting software, these templates help you add on the important text, such as your title and author name in the appropriate places without having to tear your hair out. 🙂 A minor downside is that the font options are kinda limited, so you have to live with what they offer.
12. ISBN and publisher

I tend not to get ISBNs for Amazon, but rely on their ASIN instead. It really doesn’t make a difference because most people don’t trace ebooks/Kindle books by ISBN anyway.
Enter a publisher name if you have one. If you don’t, just leave it blank.
Note: if you do get an eISBN (which you can get for free from PNM, now called Depositori), you need to make sure the Publisher name that you enter here matches the one that you used to apply for your eISBN.
13. Review your book
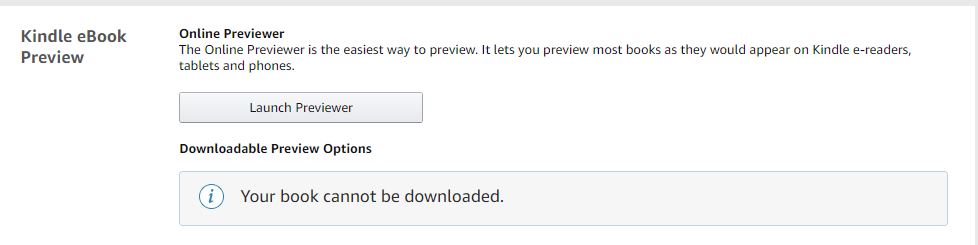
Now you’ve filled up everything on this page, make sure you review your file to see that everything looks good. If you’re using the Kindle Create file, you’ll only be able to check it out using the online previewer. As a note, Kindle Create files can only be viewed on your computer using the Kindle Previewer program — so is not a file that you’ll want to send to reviewers.
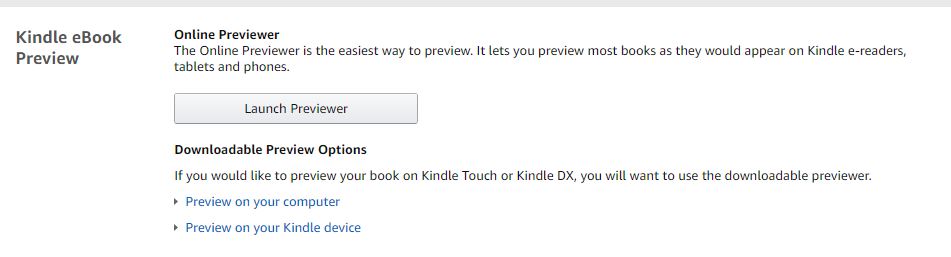
You can download a preview file (.mobi) if you use a Word upload. This is useful if you want to use the preview file as review copies, but not for anything else.
*breathe a sigh of relief*
You’re done with the most difficult part.
Once you’re happy with your file (or you can live with it in its current format because you just want to set up the pre-order page and continue fiddling with it later) then you can proceed to the next page. The actual selling part.
EBOOK PRICING
14. KDP select

If you enrol in KDP select, you can’t sell your ebook anywhere else online, including your own website. Do not recommend. Then again, we’re biased to the “Going Wide” philosophy. Choose this if it fits your marketing strategy. We talk about the whole KU vs Wide in another post.
15. Territories

This is where you want to and can sell the book. The obvious choice is “worldwide” unless you have reasons why you only want to limit your books to certain markets/regions.
We felt the need to say this again here, that there is NO Kindle Malaysia/Amazon Malaysia website, so we are 90% sure your ebook on Amazon will not be available to Malaysians.
16. Pricing

Pricing Support is another new function and a useful one at that! (Pronoun used to have something similar to this).

Because this is a short story and we’re pricing it at $0.99, the only royalty rate we can use is 35%. If you’re selling a full-length novel or even a novella, consider setting your price between $2.99 and $4.99 to get 70% royalties. You can set it above $4.99, but that usually decreases your chance of selling your ebook, unless you’re very famous.

Amazon autoconverts the prices in other marketplaces based on their current exchange rates, so you don’t really need to fiddle with international pricing unless you really, really want to.
17. Final bits!

These last two are optional.
We’re not opting for matchbook price because we’re not doing a print version of this short story. How matchbook works is if you sell a paperback on Amazon for, say, $9.99 and your ebook at $3.99, you can set up this option where someone buying the paperback can get a copy of the ebook as well at a discounted price you set (between 0 (free) to $2.99).
Kindle Lending allows the person who purchases the book to “lend” the ebook to a friend, like how you can lend a paperback you purchased to a friend.

AAANNNDDD that’s the end. Now you click “Submit for Preorder” or “Publish” and then wait for your book to appear online!
You’re probably as exhausted as we are right now, so we’ll wait until our next post to talk about the other technical bits of publishing in Amazon, including payments and tax.
Til then!
6 comments