Home » Self-publishing

Category: Self-publishing

Publishing on Draft2Digital: A Step-by-Step Guide

Publishing on Draft2Digital: A Step-by-Step Guide

What is Draft2Digital, or D2D?

As we mentioned in this post, D2D is an aggregator—or what you might call an e-book distributor. It serves as a central hub where you upload your ebook and then that ebook gets sent out to a bunch of e-book retailers. In this case, D2D can help you get your books on Amazon, Barnes & Noble, Kobo, and Apple, plus library and subscription services such as OverDrive and Scribd.

Draft2Digital acquired Smashwords recently so everything is going to be streamlined in the near future. We don’t know all the details of how the accounts (if you have accounts on both) are going to merge, but it’s something we’re keeping an eye on for new developments.

While we’re waiting for that, here’s a quick step-by-step guide on how to publish your lovely new ebook on D2D and have it EVERYWHERE ONLINE!

But first…


Draft2Digital Formatting tips

One of the reasons we’ve prefered D2D over Smashwords is because formatting your ebook is so much easier (and prettier) using their inbuilt templates and automation. It’s almost 90% less work than formatting for meatgrinder on Smashwords. But as usual, you still need to keep some minor formatting rules in place to get it to do what you want. Here are the basics.

  1. Make sure all your chapter titles are formatted the same way. As long as it’s consistent (for example, all titles are in bold & capslock or something like that or using Header styles), Draft2Digital will assume that’s the chapter title. You don’t have to manually insert a Contents page.
  2. If you use scene breaks, you’ll want to leave 3 blank lines, something like this:

    Example of scene break, showing 3 paragraph lines between textDraft2Digital will convert this into a scene break. Depending on the template, it’ll have a pretty little icon there (which changes based on the theme you select), something like this:
  3. Insert a page break at the end of your chapter; though this usually isn’t very important. If you leave a bunch of empty lines (i.e. more than three lines) followed by a chapter title, Draft2Digital will convert that into a page break anyway.
  4. Copyright page: Draft2Digital has a standard copyright page which is really barebones, so you can leave that off your document and let D2D do its thing. However, if you want to control what the copyright page says, add one at the beginning of your manuscript.
  5. End matter: These can be auto-added by Draft2Digital once you fill up your profile. However, if you have other books that are not published via Draft2Digital, you’ll need to manually add book pages to the end of your manuscript.

But okay, enough about formatting.


Here’s how you upload your manuscript to Draft2Digital

Right on your dashboard, click the big red button that says:

Add New Book button


Ebook setup: cover & metadata

Pretty self-explanatory. If you have your ebook cover ready, put it here. If you don’t yet, leave it blank. You can upload it later. But if you’re planning to publish like now, now, then you NEED to have this ready.

Then you have to fill in a bunch of basic info. If you’ve uploaded books on Amazon, Smashwords, e-Sentral or Google Play before, this is basically all the same info.

If you’re at this stage of publishing, you should already know your book title and what language you’re writing in. Though, titles are tricky.

For this one, it’s part of the Absolution Series, so we’ve put that under “Series” and we have Volume Number 1.5.

Okay, 1.5 is a weird number, but this book kind of sits in a timeline between the main two books of the series, but isn’t actually part of the overarching plot of the duology. Hence, 1.5 because it’s a sidetrack.

If your book is a stand-alone, you can leave both of these fields blank.

“Prioritized search terms” is how you want people to find your book. So since Hostage Prince is a fantasy story set in Southeast Asia, we’ve put that in for now, while we figure out what else works. Put your most important search terms at the top because if the vendor/retailer has a limited amount of search terms, they’ll only take the top few.

ETA: Don’t forget to press enter after keying in your search terms in the box! You can do that after each individual term, or you can do that after you key in a bunch of terms separated by either a comma or a semi-colon. This sends what you’ve entered into the Prioritized Search Terms box and then you can drag and drop them in the sequence you prefer.


“BISACS” (Book Industry Standards and Communications) is where they are going to try to categorise your books, something like deciding which specific niche genre it’s in. Amok was placed under Young Adult/Fantasy and Absolution will definitely fall under that too, but Hostage Prince is slightly above YA because Yosua is 20 at the start of this book, and it’s not quite coming-of-age. It’s more Yosua’s pining, faith story with lots of murder and blood, so we’re going to try sticking this in Fiction/Fantasy/Action & Adventure (you can’t have Fiction & YA Fiction at the same time) and maybe see if it’ll cross over into the Christian/Fantasy lists.

You can choose up to 5 but the top two are the most important.

Then you click

Start Ebook button


Ebook Details

This is where you upload your manuscript in doc, docx, rtf, or epub format to Draft2Digital.

If you already have a nice epub you really want to use, and you don’t want to utilise Draft2Digital’s autogenerated front and back matter, then just upload the epub.

If you intend to use their autogenerated stuff, stick with the Word document.

The page is currently reminding us that we have not yet uploaded a cover. Clicking on the “Edit shared metadata and cover” link is where you can go back and make changes to everything that appeared on the ebook setup page. If you’re setting up a pre-order, enter your targetted pre-order date. If you’re publishing now, well, just choose today.

“Ebook Description” is basically your back cover copy of the print book (if you have one), or what appears on the sales page on, say Amazon. It tells people what your book is about.

The next two sections are optional but are great if your book is a collaboration, or you want to credit a lot of different people who have worked on your book.

If, for example, you are co-authoring a book with someone else, Draft2Digital lets you split your royalties.

You can also credit other people on the book, like your cover designer!

E-ISBN

Draft2Digital requires an e-ISBN, but since we uploaded this while on preorder and had not yet applied for an ISBN, we just added a placeholder number first.

WARNING!!!! If you do this, make sure you remember to update this to your ACTUAL e-ISBN BEFORE you authorise your ebook for publication! Once it’s published, you can’t change this anymore. Then if errors appear, you’re going to have to unpublish and delete the whole ebook and start the publishing process again.

There’s an option to use free Draft2Digital-provided e-ISBNs (so you don’t have to apply for your own), but we disabled this on our account since we apply for all our e-ISBNS anyway. (Yay free e-ISBN from PNM!)

Okay, so done?

Save and Continue button


Ebook Layout

Here’s where we get to the fancy stuff!

Remember we said you don’t need to insert a manual Table of Contents?
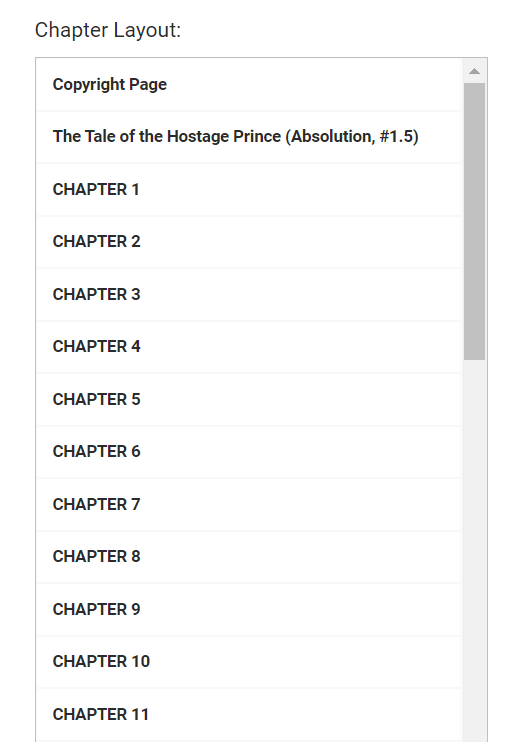
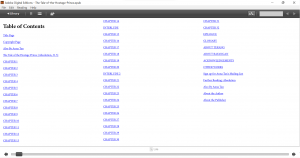
autogenerated Table of Contents


Yup, Draft2Digital generates one for you based on your document headers. If something doesn’t look right, click on

Help! These aren't my chapters! button

This will take you to an “Improper Chapter Detection” page, where you can select which formatting in your manuscript denotes a chapter title.

If that’s too much trouble—or you realised that you never really set any headers for your chapter titles, just go back and make all your chapter titles consistent then reupload the manuscript. Just using Word’s generic header styles will work fine.

Once your chapter titles have been fixed, you can add start adding all the extra front and back matter.

Front Matter

Introductory Pages: Title Page, Copyright Page, Dedication

We’re adding a title page because we didn’t include one in the manuscript. We already have copyright & dedication pages included in the manuscript, so we don’t need to select those.

Back Matter

Promotional Pages: Also By, New Release Email Notifications Signup, and Teaser

If you’ve already published other ebooks through Draft2Digital, you can add them to your book (options are beginning/end/both) so that readers can see what else you’ve written and click on the links to buy them.

There’s also a new release signup, kind of like a “follow author” option, so that the next time you release a book in Draft2Digital, they’ll get an email about it.

The Teaser option will put a brief blurb about your other books at the end of your ebook. We’re guessing that people who read Hostage Prince would probably have read Amok, but you never know! Sometimes people read out of order, since this isn’t a strict sequel anyways, so this includes a short preview of Amok.

Biographical Pages: About the Author, About the Publisher

Biographical Pages is where you add your profile and your company’s profile (if you have one). This info is set up when you create your account (under Account Settings) so we’ll probably stick that bit in another post.

Now,

Save and Continue button


Preview time!

Preview of ebook

Draft2Digital lets you preview the converted ebook directly on the web, but the viewer can sometimes be a little wonky. We usually like to download the mobi & epub copies to have a closer look.

But before you do that, choose your template style!

We previously used Science Fiction & Fantasy > Regal for Amok, but we’re going with All Purpose > Maraschino for this one.

Template sample - Maraschino, using phrase caps for chapter and scene decoration.

You can also set if you want to start your chapters and scenes (after a scene break) with Drop Cap (the first letter is really huge), Phrase Cap (the first line is in capitals), or None (no fancy stuff needed).

Okay, so now you can download the stuff and go review your ebook!

Download your book preview: Mobi, epub, PDF

Basically, at this point, you can keep revising stuff until you’re happy with how the book looks. Reviewing and revising might take a while, but don’t worry. It’s all saved in the system and you can always come back to look for your draft on your dashboard:

My Books dashboard


Release the Kraken!

Right, you’ve reviewed it a million times, updated for typos, found the best theme/style, updated your cover, screamed at your cover, changed the theme again, updated your metadata, updated your eISBN…and now you’re ready to publish!

Remember that this is your last chance to put in the right eISBN (if you’re stupid enough to use a placeholder like us). Because if it’s wrong, you have to delete this whole thing and start again.

Select: i have reviewed this manuscript and approve it for release for distribution to any sales channels I select on the next step.

Alright!

So once you’ve approved your book for release, you get to the publishing page where you get to pick your price and where you want to sell your ebooks.


Ebook Publish

Here’s where you put in your retail price and select where you want your book to be sold. You’ll want to put the full price here because sales or promotional prices can be set on another page.

List of digital stores: Barnes and Noble, Kobo, Apple, Tolino, Vivlio Amazon, Subscription Services, Kobo Plus

We don’t select Amazon distribution via Draft2Digital because we DO have a KDP account where we upload our ebooks directly. Selecting it here plus uploading there would create a conflict and might get not just the ebooks pulled from Amazon but the account closed/banned as well. If you don’t have a KDP account and have no intention of opening a new one, select this so that your ebook is distributed to Amazon. There will be a bunch of things to confirm before they actually distribute to Amazon, though.

Library pricing
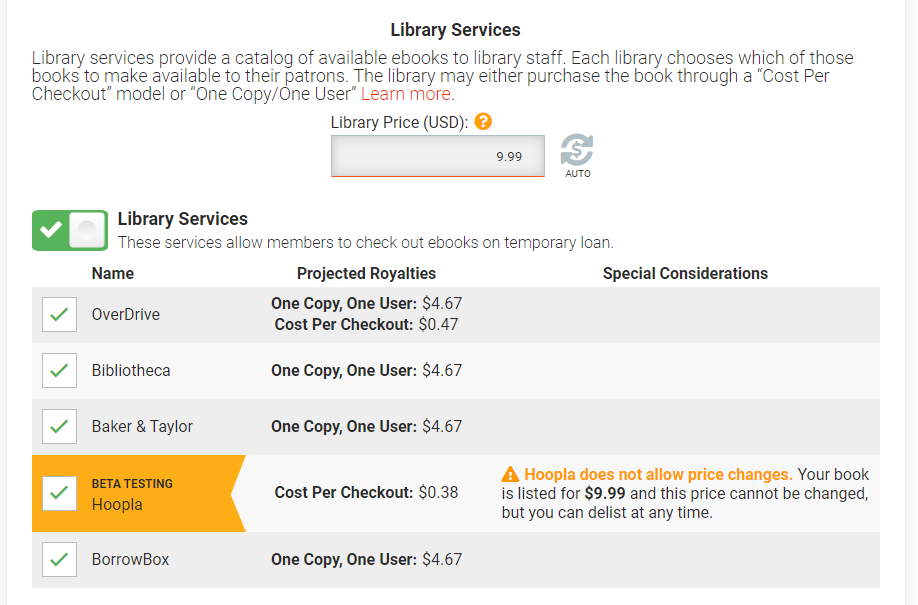
Library Services: OverDrive, Bibliotheca, Baker & Taylor, Hoopla, BorrowBox

The pricing for this is a little confusing, so we usually just use the “auto” price so that Draft2Digital selects the best price based on our selling price.

Then you get to click publish!

Phew! (Break time)


Your book page


This book page is where you’ll be able to update or edit things later on. It’s also where you can add a print book (we’re currently using IngramSpark and Amazon KDP’s POD) or an audiobook.

D2D Print beta - sign up for more info

The Draft2Digital Print Beta runs on a waiting list so you may not be able to use it right away.

What if I wanna run a sale?

Well, that’s where the handy “promotion” button comes in! We used this to set up our pre-order price.

Promotion Details - schedule a promotional price

This page tells you your current price and the expected royalties you’ll get at that price. You can set a promotional/sales price to run on certain dates and they’ll tell you how much royalties you’ll get from sales at that promo price. You can also set promotions to run only in specific territories if you’re targeting some kind of country-specific celebration.


Aaaaanddd that’s pretty much everything you need to know about uploading a book on Draft2Digital for now.

Publishing on Amazon: Formatting your ebook

Publishing on Amazon: Formatting your ebook

If you’re wondering, we’ve decided to pull out the section about formatting your ebook from the Publishing on Amazon: A Step-by-Step Guide post and put it into its own post! This is mainly because it really is a post on its own, due to the length of it, and it was making the uploading steps a little too confusing.

Also, new update! As of recently (well, we don’t remember when, but at least end of last year), you can now upload a pre-formatted e-pub if you have one. So, if you’re already getting someone to create an e-pub file for you to use on Google Play or E-Sentral, now you can just use that same file here too!

Here’s also how you can create your own e-pub file via Scrivener.


Formatting your ebook via Microsoft  Word

Got your manuscript ready? Great!

We’re using Microsoft Word in this sample because it’s the most common software. You can use any other text processors, of course, but you’ll need to save it in a .docx file for uploading.

A) Add in your front matter

 
This is all the stuff you usually find in the front of a book: title page, publisher, year published, license notes, etc.

You can create something fancy and elaborate like the stuff in a paperback. The simplified version shown here was adapted from the Smashwords guide and has worked for the past few years, so it’s an easy option.


B) Format your body/text: use a standard setting


Remember that you’re formatting for ebook, so whatever fancy stuff you do, it’s 90% going to be overridden by the reader’s Kindle settings. I use a standard 12 point Times New Roman with a 0.3” first-line indent with 0 line spacing and no spaces before/after paragraphs. This gives you a nice tight look.


C) Format your chapter headings: use headers


Format your chapter headings using a “headings” style as this simplifies the process of getting your Table of Contents up. I assure you this is 100% easier than Smashwords, so be grateful! Just set your chapter title (in this series, we use roman numerals, but your chapter headings could be anything you want) to the Heading 1 style and make any stylistic adjustments you wish (we centre & bold the text and change the font to Times New Roman) then copy the format to all your chapter headings.


D) Formatting chapter breaks: use page breaks


Use the page break function to separate your chapters (shortcut: ctrl+Enter). DON’T use multiple paragraph breaks! Multiple paragraphs will probably not be read/recognised by Kindle so all your chapters will appear mushed up into one super long chapter instead of starting on a new page/section each time.


E) Add in your back matter

Your back matter will likely expand over time as you publish more books. You’re publishing more books, right?


We like to leave a little reminder for the reader to leave a review, but this isn’t necessary.

As a first-time author, the very basic you need is an “About the Author” section where you can link your webpage or other social media that you want to direct readers to.

Once you’ve built a backlist, you can add them into your back matter so that if readers like your book, they can go and look for other stuff you’ve written.

Don’t forget to format the headings of your front and back matter as “Heading 1” too!


F) Create a Table of Contents (TOC)


Now that you have everything in place, it’s time to set up your Table of Contents. Go to Reference>>Table of Contents>>Custom Table of Contents.

Untick “show page numbers” because page numbers are irrelevant to ebooks. Once it’s in the Kindle, the page numbers will change according to the reader’s settings. What you DO want is for the TOC to be clickable (hyperlinked) so that they can jump ahead to chapters if they wish.

Make sure that everything you want to appear on the TOC appears—if they don’t, you’ll have to check that you’ve formatted all the chapter titles/headings as “Heading 1”.

Additional reading: https://kdp.amazon.com/en_US/help/topic/G200645680


Formatting ebooks on Kindle Create

Okay, so Kindle has this snazzy new Kindle Create (KC) program, so we tested it out for this demo.

Note: We deleted the TOC for this demo as it seems that this is where the formatting steps diverge.


Right. You’ve got your manuscript ready and you’ve done all the steps from A to E above. Now you open Kindle Create, select Novels, Essays, Poetry, Narrative Non-fiction. (Unless, of course, your book is one of the others, in which case this guide isn’t for you).

Choose the file. Upload the manuscript. It asked if we wanted to do a bunch of stuff, which was obviously yes.

Awesome. KC found all our headings and created a TOC! It doesn’t appear to be inserted in the text though, unlike the Word document.


Hmmm with these clickable format buttons, we’re able to define a copyright page, splitting it off from the Title Page. Looks alright…

We didn’t format mid-chapter separators in the Word file but Kindle Create has a standard separator format. If you missed any chapter titles or quotes in your Word Document, you can use this to define them too. Nice.


Ooh, Drop Caps. It looks like A Still, Small Voice might feature drop caps just because of this function. Ha. We didn’t test the “poetry” function because this ebook doesn’t have any.


Autosave reminders. Good job.


This pic was already in the word format and this is how it appears when converted over.


We tried reuploaded this picture to see how it works. KC only accepts pics in jpg.


KC has a handy previewer, so you can see what it actually looks like on a (mock) Kindle.


Oooooo themes! Not really necessary, but fun. Also, this is where you get a prettier ebook than just formatting in Word, I guess.


When you click publish, Kindle Create saves a separate file (.kpf) to upload on the site, same as if you upload the Word doc.

Verdict: Not really necessary, but it’s easy enough to use. And kinda pretty.


So does that mean I have a formatted ebook for Amazon now?

If you followed the Microsoft Word steps, you’ll have a formatted Word Document (.docx) that you can upload to Amazon.

If you used Kindle Create, you’ll have a KC file (.kpf) that you can upload to Amazon.

Head back to Step 10 of the Publishing on Amazon: Step-by-Step Guide to see how to upload it.


One thing to note: if you create your ebook via Kindle Create, you will not be able to download a preview file that you can send to reviewers. All you’ll have is the .kpf file that can only be read on Kindle Previewer.  However, if you use a Word Doc or an epub to upload to Amazon, you’ll be able to get a .mobi file to review that you can send to reviewers.

Editors: 3 questions to help you find the right one

Okay, so you’ve written your masterpiece, your 80K-word novel, your 40K novella, or something in between. It’s all shiny and pretty and you need to find an editor to make it even shinier. We talked a little bit about the different types of edits in the How Much Does it Cost post, so if you need a quick refresher on developmental edits, line edits and proofreading, check out that post. The question now is, how do I find an editor? Do I really need one?


Finding an Editor

One of the main reasons people tend to look down on self-published works is the quality of the writing. In the early days of self-publishing on Amazon, anyone could just put up their first draft, slap on a cover and hey, published! Then the entrepreneurial writers came along and made a business out of it, producing works polished enough to compete with trade publishing. However, the bad name still lingers—and you still do see some sloppy first drafts up for sale.

A traditionally published book is often pared down and polished until it shines. Sometimes, honestly, a self-pubbed book is sent out when it’s just merely gleaming. That’s often a big difference to readers—and yet, it’s an easy mistake to avoid. As we said in our very first post:

“Self-publishing isn’t about doing away with the gatekeepers. It’s about making yourself your own gatekeeper. Releasing a book that isn’t quite ready or good enough will harm your career as you’ll put off any potential readers. Before you self-publish, please be sure that your book is the best that it can be, not according to your own standards, but in accordance with worldwide publishing standards.”

Actually, let’s amend that: before you send your work ANYWHERE, make sure your work is the best that it can be. Because if it’s not that great, the agent/publisher isn’t going to take you on either.

So with all the freelance editors out there, how are you going to find the right one for you? Here are three questions to ask that will help you pick the right one.


Editors: 3 Questions to help you find the right one

1. What are your weaknesses?

It’s not nice to talk about weaknesses, but sometimes you need to. If you’re great at story plots but not so great at grammar, you’re better off looking for someone who’s more of a line editor. If your language skills are awesome but your plot and story development are meh, you should be looking for an editor whose strengths are in developmental edits.

Ultimately, every writer needs both, but when you’re hiring an editor, you should really concentrate on finding someone who can help shore up your weaknesses.


2. Does the editor understand your vision?

Everyone has agendas. Even you. You probably have a specific vision for your story and what you’re trying to achieve with it. And sometimes the vision your editor has for your story is going to be… different.

The most important thing about a good editor is that they understand what you are trying to do as a writer and then work with you to achieve that through your work. So if you’re aiming to write The Great Malaysian Novel using Malaysian English, you’re not going to work very well with an editor who insists on italicising every local term or correcting everything according to the Queen’s English.


3. Do you get along with the editor?

This doesn’t really have anything to do with your writing, your writing style, or your work. It’s to do with personality. You could have found a really great editor with really great pointers on how to improve your work, but if everything they say or the way they say it makes you bristle with annoyance, your partnership isn’t going to last very long. Either you’ll get upset, or they’ll get upset, and then one of you will up and leave.


So like that how?

What you need to do (and I’m sure the editor you’re scouting will want too) is a test edit. This could be a page or a chapter of your work, something relatively short and not time-consuming. This will give the editor a feel of your work and what you’re trying to achieve. You’ll also get a taste of how the editor works and what kind of comments they give (and how they give it).

From there, both of you can evaluate if your partnership will be mutually beneficial (and you wouldn’t mind paying money for their services) or if you should continue looking for someone else.

Remember that the editing process is a partnership. Not everything your editor says is correct, and not everything you want to do actually works. Finding the right editor is like finding the right dance partner: you need to trust each other to take the lead at different points in the process.


If you’re looking for an editor, consider Teaspoon Publishing’s Services. We’re nice, we don’t bite, and we specialise in fiction. 🙂

Organising an online book launch

In recent months, we’ve personally been getting several queries about book blog tours and online book launches. After typing up email summaries several times, we’ve decided to just compile all those emails into one post about organising an online book launch!

organising online book launches

There are several ways to do an online book tour, but most of them have to do with bloggers. Bloggers are your friends, if you still know anyone who blogs (you’ll probably find some on KLBAC).

Organising an online book tour/launch is as easy as asking all your family, friends, and random strangers on the internet to host you during launch week (or any random dates you think up). It’s also as difficult as planning launch materials, coordinating dates with the bloggers, or maybe hosting a live Facebook event. There’s a lot of coordinating and networking to do, so it may be best to leave it in the hands of the professionals!

If you’re considering an online book launch, here are several standard posts to consider.

The Cover Reveal

The cover reveal is like a pre-release drip, where you share the cover of the upcoming book plus basic details. This post works best if there are existing fans who are excited about the series, and if there is an ability to pre-order the book. At the bare minimum, post materials should include:

  1. the shiny new book cover (duh!),
  2. the book blurb/description,
  3. pre-order links (you gotta channel that excitement somewhere), and
  4. pre-order sales or promotional announcements (e.g. discounted price for pre-orders, exclusive goodies, additional bonus material, previews, etc)

The Launch Post

Usually posted on the day the book goes on sale, this is a general announcement to say hey the book is now out! Post materials usually include the following:

  1. the book cover,
  2. the book blurb/description,
  3. buy links,
  4. launch promo/sales announcements, if any (e.g if the launch price is only valid for a period before it goes up, discounts on earlier books, etc),
  5. author bio,
  6. author picture,
  7. tour graphics/banner, if any (mainly because pictures make it easier to share & garner interest), and
  8. an excerpt or preview (not too long, preferably an exciting hook from the book).

A Review Post

Reviews would usually be posted on or about the launch week/month. If they’re posted before the launch, resharing these posts will help you build more organic buzz as this is what others are saying about the book instead of you just announcing BUY MY BOOK. Reviews have the most impact 2 weeks before (if you take pre-orders) and 6 weeks after the actual release date (crunch time for a new release).

Review posts are slightly trickier because you need to send a review copy (digital or otherwise) to the reviewer hopefully one to two months before the launch so that they have the time to read and write the review. It’s also tricky because there’s always the chance that the reviewer might not like the book! If you can, politely request the reviewer to also post their reviews to Amazon & Goodreads when your book is available.

Post materials should include:

  1. a review copy to be sent to the reviewer/blogger 1 – 2 months before launch (they shouldn’t be sharing this with anyone else), and
  2. Everything from the launch post (the blogger can then decide what they want to add to the post)

Guest Posts

A guest post is usually an opportunity for you to talk about your writing and/or your book. Some bloggers have a theme for their blog, others keep it open to the authors. If a blogger offers/agrees to host you, check with them if they have a specific topic in mind and if they have word count limits. Post materials would generally include:

  1. A guest post of about 500 – 800 words, and
  2. Everything from the launch post (the blogger can then decide what they want to add to the post)

Author/Character Interviews

This is just a bit of fun to get to know the author better. You can predraft a generic interview with FAQ-type things, but most bloggers would have their own questions to ask the author. Just make sure you have everything from the launch post on hand (especially your book cover and buy links)!

Facebook Live Events

Got a Facebook Page? Schedule a launch event where you invite all the fans on your page, and your newsletter, and random Facebook strangers to listen to you ramble about your book! Some launches use the live facebook video (which can be a scary thing) whilst others use frequent posts concentrated around a few hours on the web. This is a great way to interact with fans (and friends), give out some freebies, or con them into buying your book.


Book launches and blog tours can be exciting things… or they can be super dead. It really depends on who’s on your team and who’s excited enough to share your books (and about you) on social media! It’s also really cheap to organise if you’ve already organised your materials, can work out some graphics on Canva, and can work out a simple spreadsheet to coordinate who’s posting what when. Make sure you also share their posts on YOUR social media!


Publishing on Smashwords: Meatgrinder and other functions

In our second instalment on publishing on Smashwords, let’s get to through the icky stuff first: The Meatgrinder. Smashwords has a free style guide you can download here, where founder Mark Coker gives you several ways to format your book, but by far the easiest and the most effective way is what he calls the Nuclear Method.

Meatgrinder and other Smashwords functions

Here are the quick steps to formatting for Meatgrinder:

  1. Copy all your text and paste into notepad.
  2. Open a new Word document.
  3. Cut everything from notepad and paste into the new word doc. This ensures that there’s no weird formatting left over from whatever Word did in your last document.
  4. Highlight all your text and add in your first paragraph indent. DO NOT TAB FOR THE LOVE OF GOD. If you’re not sure what that means, it should look like that bit circled in Word.Indenting a paragraph
  5. Go through your text and
    • add all your italics/bold/underline (if any) back into the text. This extra step, while annoying, also helps you proofread your book one last time. And because you’re not focusing on the words per se, it helps you pick out random typos that you’ve probably glossed over because you’ve read it too many times.
    • Add in page breaks after each chapter.
  6. Format your chapter titles and save them as bookmarks.
  7. Add in your front matter. We have a standard template front matter that we just paste in and change details.
  8. Create your table of contents (“TOC”). This is the most annoying part because, to make sure it works right, you have to do a manual one. DO NOT ON ANY ACCOUNT USE WORD’S AUTO TOC. You’re just giving yourself more trouble. What you do is list down all your chapter titles. Remember the bookmarks you saved in #6? Yeah, now you link those bookmarks here.Sample Table of Contents and bookmarks
  9. Add your end matter. Again, create a standard template that you can paste in and change details. This usually includes other books you’ve written, an about you, and a nice “please review” request!

So this means I won’t get any Meatgrinder errors?

The most frequent cause of errors, by far, is caused by hyperlinks, because Word likes to add them in randomly. We know. It has caused us pain many many many times.

This is what it looks like:

Random hidden bookmarks

These bookmarks tend to pop up like ghosts. Like you could look at it in one version and it appears to be clean, but if you deselect and then select hidden bookmarks, they suddenly jump out at you. You just have to patiently delete them one by one, because there is no “delete all button.”

What you want is a clean file like the picture below, or the one under #8, which only shows the bookmarks you’ve created and which are linked to your TOC.

Clean bookmarks look like this

The second most frequent culprit in Meatgrinder errors is your line spacing. If you cut and paste your text to a new Word doc, this usually won’t cause any troubles. But just to be sure, your line spacing should show “0” or “Single” everywhere otherwise your epub might have some weird spacing issues.

Clean spacing

Still too difficult? We’re more than happy to format this for you!

Okay, now that’s out of the way, let’s head to the cool stuff about Smashwords!

Global Pricing

If you’re worried about how fluctuations in USD will affect the price of your book, Smashwords gives you a global price lock to fix the prices in foreign currency.

Global pricing for Smashwords

Just go to “global pricing” on your dashboard, and then “Add lock”.

Series Manager

Got a series? No worries. Match them all here. Way better than having to email back and forth with Amazon to get it done.


Premium Distribution

One of the things that Smashwords has going for it is that it is both a retailer AND a distributor/aggregator. If you want to check (or control) where your book is being sold, head to the channel manager.

Once you’re approved for the Premium Catalog, you can head over to the Channel Manager to decide where you want Smashwords to distribute your ebook to.

We usually just opt out of shipping to Amazon because there are some weird conditions as to when Smashwords will actually be able to distribute to them (after a thousand copies sold or something?). It’s also easier to just upload directly on Amazon, especially with Kindle Create.

Coupons!

This is by far the one feature we wish every other platform would also offer. Want to give someone a discount? Or have a sale specifically for a small group of people? Smashwords lets you create discount coupon codes that you can limit or privately distribute instead of having a store-wide sale for the whole world.


What’s your experience with Smashwords been like?

Did you have a terrible time? Do you love the platform? Do you have any tips or queries? Let us know!

Publishing on Smashwords: A Step-by-Step Guide

Publishing on Smashwords: A Step-by-Step GuideSmashwords was launched in 2008, and whilst it isn’t quite as big as Amazon or the “big 5“, it’s still a pretty established e-book retailer. The main thing that goes for it is the fact that it is both a retailer and an aggregator. Meaning, once you upload your book onto the site, it can help you distribute your ebook to almost all the top five retailers (except Amazon) as well as other e-book sites and libraries.

One of the main reasons Smashwords didn’t take off as much as it could have was because of their conversion system called the Meatgrinder. To get your ebook on Smashwords in the past, you needed to upload a formatted Word doc and get it processed through the dreaded Meatgrinder for conversion into the various supported file types, like epub and mobi (Kindle). Because the Meatgrinder was so finicky, many people just gave up after receiving multiple error messages. That bad will has kind of followed it since, although the Meatgrinder has been simplified quite a lot and it’s much easier to use. You can also directly upload an epub file now, so that’s a bigger plus.

Still, if you want to really know what formatting an ebook is about, Smashwords is the way to know the ins and outs, with some hair pulling along the way. But at least after that, you’ll be like eh, every other formatting is easy peasy. We’ll talk about that in the next post, though.

First, we’ll walk you through the Smashwords dashboard and how to upload your book.

The Smashwords Dashboard

Smashwords dashboard

There’s a lot to see here, but we’ll mainly be looking at “Publish” and Metadata Management in this post.

Clicking Publish will bring you to the uploading page, but first:

Publish Your Book

The rest of the process is pretty similar to how you would publish on Amazon or E-Sentral.

Basic Book Information

1. Title and Release Date

Smashwords: Title and Release Date

The good part of making your book a preorder is that you’ll be able to streamline the release of your book across all platforms, taking into account Smashwords’ review process (usually 1 to 2 days) and the distribution process (usually between 3 to 5 business days). Readers can preorder the book as and when it’s distributed. However, because Smashwords is weird, the site itself doesn’t actually let readers preorder. It just creates the book page and tells you when the release date will be.

2. Book Synopsis/Description

Smashwords requires a short description but also lets you put in a longer one for their site.

To write one, think about the books you’ve read and what made you decide to read it. Oftentimes, the cover attracts our attention, but it’s the description of the story that sells it to us.

The main points to consider are:

  • what is this book about?
  • who is it for/who will like it?

3. Language

I love the Commonwealth/International option because not everyone writes like the Brits. Or like the Americans either. At any rate, Smashwords accepts a whole range of languages, including Chinese!

Money stuff

4. Pricing

One good thing about Smashwords (we think many good things about Smashwords) is that they offer a very comprehensive breakdown of your expected earnings so that you don’t get caught unawares. In this case, this “billing fee” projected is the Paypal charge per shopping cart, which will fluctuate depending on how many books a reader purchases at the same time. Take note that this pricing is before any withholding tax. Before Smashwords releases your earnings to you, they’ll still handover the 30% US Withholding tax, so you’ll only get 70% of that $0.56 earnings per book.

The “Let my readers determine the price” option sounds super cool but makes your book ineligible for distribution to most other platforms, so use with caution.

5. Sampling

This is the standard across all platforms.

Categorisation


Smashwords allows you to choose up to two categories.


Smashwords has an adult filter that users can turn off/on so that erotica will not be displayed to minors and to users who do not want to read that kind of content.

Similar to “keywords” on Amazon KDP, tags are search terms that relate to your book! Start typing in your keywords (they can be phrases) and you’ll find lists of common terms that others on the site are using. You’ll also find a lot of these terms have been misspelt.

The Actual Book

6. Book formats

Who uses PalmDoc and LRF nowadays? Do those devices even still work? But hey, if it allows older readers to read your book, why not? One thing to note about Smashwords is that once someone purchases a book, they can download it in multiple formats, including PDF, AND allows for reading online (html version) so it’s not the safest platform for anti-piracy. But if you link that with their old-school very un-snazzy website, you kind of realise that they’re pretty much trying to cater to older users of the internet who maybe don’t want to upgrade or can’t be bothered to get new fancy tech anymore.

7. Book Cover

Oh finally! Smashwords has a 1400 pixels width minimum, so make sure you take that into account. They also need the Author Name to match your metadata (the name you’re publishing under). Not doing this will increase your chances of your book being rejected during the manual review.

8. Your Manuscript

Ah, the formatted manuscript. As mentioned, they need a formatted .doc file (not even .docx!) or an epub. Note that the epub comes with a lot of caveats. But we’ll get to the actual formatting of the manuscript in our next post, because frankly, this one is too long already.

Publish!

Agree to all the legal stuff and publish!

As a publisher account, we can create “ghost accounts” for people we publish for, which is how we set up your Smashwords account and book for you before we transfer it over to your account. As an individual user, you won’t have this option.

And then you wait…

First, for the automated conversion.

Yay number 1: Book page is up. This page will load automatically once it’s done. 

Yay number 2: Autovetter and epub check passed! This will appear in your email.

Now you can HEAVE A SIGH OF RELIEF. 90% of the time, if you pass the autovetter and epub check, there won’t be any problems with your file during the manual review.

ISBN

You’ll be getting a few emails now, one of which will tell you that you haven’t got an ISBN! You’ll be able to fix this in the ISBN Manager under Metadata Management.

You can get your own ISBN from PNM, or you can get one from Smashwords. Either way, you’ll see that once you click +Assign an ISBN.


Once all that is done, you should see your book on your dashboard:

The Pending Review refers to the manual review as to whether the book can be shipped out to the “Premium Catalog” (i.e. other retailers and libraries. If you do an immediate release, your book will already be available on the Smashwords site. As mentioned before, it usually takes one to two days for approval, and then three to five business days for distribution.

Either way, you’ll have a pretty book page you can share now.

Note that this is what it looks like when you’re logged in. No one else can see all the information about sales and downloads, nor will they be able to download the full versions unless they’ve purchased the book. They will be able to get the first 20% sample though, so that they can check out if they want to buy it.

There’s a bunch more cool stuff to talk about Smashwords, but we’ll save that for another time. This includes global pricing and coupons!

Until next time.

I’ve written a novel… now what?

The question most people ask after NaNoWriMo is: Now What? Sometimes that question means ‘what do I do with this 50K novel I’ve written?’ Sometimes it’s ‘I didn’t finish my novel, what do I do now?’

The answer to both is: keep writing.

I've written a novel... now what?

Just because you’ve finished one month of writing doesn’t mean that you just stop there. Because whilst the point of NaNoWriMo is to have written a novel, if you’re serious about writing, you can’t just only write for one month of the year. You’ve got to make it consistent—and that’s the real point.

You can think of it this way:

Isi Tersurat: write 50K in a month… win!

Isi Tersirat: create a writing schedule (daily/weekly/monthly) that works for you so that you’re on track to be a serious full-time novelist… win! Remember what we said in this post?

But practically…

  • If you haven’t finished your novel yet (whether or not you hit 50K), keep going. You’ve already started your novel, you might as well finish it.
  • If you’ve already finished your novel (whether or not it was 50K), now’s the time to take a step back and look at it with a critical editing eye.

The Easy Yes/No Questions:

  1. Does the story have a solid beginning, middle and ending?
  2. Does the plot make sense?
  3. Is this story worth telling/something you really want to share?
  4. Are you satisfied with it as it stands?

If you answered yes to all four, then you can start working on editing and polishing it into something for others to see.

If you answered no to ANY of the above, then it’s time for rewrites!

What’s rewriting?

Rewriting is when you pull your novel to pieces and then put it together again to make it better.

You’re addressing all the questions above, making sure that your story has a good plot that makes sense and is complete in itself. It may also mean you need to restructure the whole thing if you write anything like we do, haphazardly jumping from scene to scene, up and down the timeline.

When you’ve finally come to the point where you’re satisfied with your story, or where you don’t know how else you can make it better, that’s when you workshop it or bring it to a critique group.

And will be the next post.

For now, here’s a short article on rewriting:

https://www.writersdigest.com/online-editor/the-art-of-writing-is-in-the-rewriting

Creating an EPUB via Scrivener

One of the downsides of publishing on E-Sentral and Google Play is the fact that you have to create and upload your own epub file. Other platforms, including Amazon and Smashwords, allow you to upload a Word file (.doc or .docx) and does the conversion for you.

What’s an epub?

EPUB is an e-book file format which is used on most platforms, including smartphones, tablets, computers and e-readers. It’s HTML based so even if you don’t have a specific e-reader on your computer, you should be able to open it in most browsers.

How do I create an epub?

We don’t know the specifics of how exactly you’d code an epub, but here’s the easy version using Scrivener.

Organise your chapters into folders.

Create Folders

Organising your chapters into folders will tell Scrivener where your actual chapter breaks are. In the screenshot, you’ll see that sometimes we put in several text files into the same folder. These are in-chapter breaks.

Update your front matter files.

This includes adding your cover picture (which can be done by dragging the picture file into the folder, creating a title page (as above) and a copyright page (per below).


Add your back matter.

add back matter

We usually add this to the end of the Manuscript itself, as there aren’t any pre-formatted folders for Back Matter. Back matter, as said previously, would include information about your other works or how to contact you via email or social media.


Compile your file.

Under “File”, you’ll find the compile function. There are several steps to this:

a) Select e-book format (with or without parts). This will tell Scrivener that you want to create an epub.

b) Select the cover file you previously added to the front matter folder.

c) Update your metadata.

d) Click compile!


Check your final files.

Now that everything is done, open your brand-new epub file to test that everything looks like it’s supposed to. You can also run it through this checker to make sure there are no errors.

And you have an epub file to upload to E-Sentral and Google Play!


If you have problems creating an epub file, or you don’t own a copy of Scrivener, check out our publishing hub. We’ll be able to create an epub file for you for as low as RM120.

Applying for an ISBN from PNM

Applying for an ISBN from PNM

Getting an ISBN from Perpustakaan Negara Malaysia (PNM) is really easy—and it’s free! Whilst many ebook distributors/aggregators provide free ISBNs and/or have their own tracking system (eg: ASIN on Amazon and GGKey on Google Play), E-Sentral does not. They require you to apply for one from PNM, as we mentioned in our post on publishing on E-Sentral.


What’s an ISBN?

ISBN stands for International Standard Book Number and is a unique number associated with your book. An ISBN is assigned to each edition (except reprintings) of a book, which means that your e-book, paperback and hardcover would all need a different ISBN. If you want a quick reference, pick up the nearest book, turn to the back and look at the barcode. There will be a 13-digit number (or 10, if the book is super old)—that’s the ISBN!


Why do I need one?

The quick and easy answer is that it’s the simplest way to track and catalogue your books. For print, it’s how the cashier can ring up your sale quickly, by scanning the barcode. Like we mentioned earlier, some online retailers have their own tracking system and do not require an ISBN, but you can also link an ISBN to books sold on those platforms if you wish to. They (meaning Amazon and Google Play) can get away with is mainly because they’re big enough.

If you’re going through a distributor or aggregator such as Smashwords or D2D, you will need an ISBN because it’s a requirement to distribute to sales channels such as Kobo, Apple, and Overdrive.


Do I need a different ISBN for each of my different ebook formats?

According to best practices, each sellable format of your book should have a unique ISBN. Which means that your ISBN on E-Sentral should be different from the one on Smashwords (but this would be the same for all platforms that Smashwords distributes to since they only distribute the epub version).

Confused?

Don’t worry. Just take it that each place you upload to BY YOURSELF probably needs a different ISBN. If you’re not the one uploading it personally, then the distributor or aggregator you use will kau tim that for you.

In actual practice, we apply for ONE ISBN for print (used for both IngramSpark and Amazon POD) and ONE eISBN for ebook (used on our website, Draft2Digital, and Smashwords). If you want to do this, keep this important factor in mind: all the details for your print book MUST be the same. Same size, same cover, same paper settings, same type of printing and binding.


Okay, so how do I get an ISBN from PNM?

Here’s the updated process for applying for an ISBN that we have been sitting on for like, what, two years now! All you need is the internet! And screenshots, urgh screenshots.

Registering an Account

First of all, register for an account at Depositori. You’ll have to activate the account (by clicking the link they send you) and then log in again. Alternatively, if you have an account with e-sentral, you can just click on “Enroll” from the publisher panel.

Depository shortcut on the bottom of the e-sentral publisher panel

Next, fill up your Maklumat Penerbit. This is the same as the earlier Borang 1 (see below); so basically questions about YOU, whether you’re applying as an individual (you’ll need your IC) or as a company (you’ll need your company forms). We don’t have any screenshots for this because we used the e-sentral shortcut and linked our fancy new online account to our pre-existing account.

Their guide says they take about 2 working days to approve this. However, we think* that you’re supposed to start applying for the first ISBN at the same time that you apply to be a publisher. At least, that’s how it worked for the paper version, and it didn’t seem like they changed that process for the online version.

*at any rate, our memory is super spotty on this, so if you find out otherwise, let us know so we can update this!


Applying for an ISBN

Here we are at the meat of the thing!

Here’s how you do the thing, with screenshots from when we published The Tale of the Hostage Prince! (Which shows you we’ve been sitting on this post for months). There are 4 pages in total.

TIP: You can’t actually save progress, so you need to prepare everything beforehand unless you like filling up the same form multiple times.

On your very colourful dashboard, click Perkhidmatan Mohon ISBN/e-ISBN.

depositori dashboard

Page 1

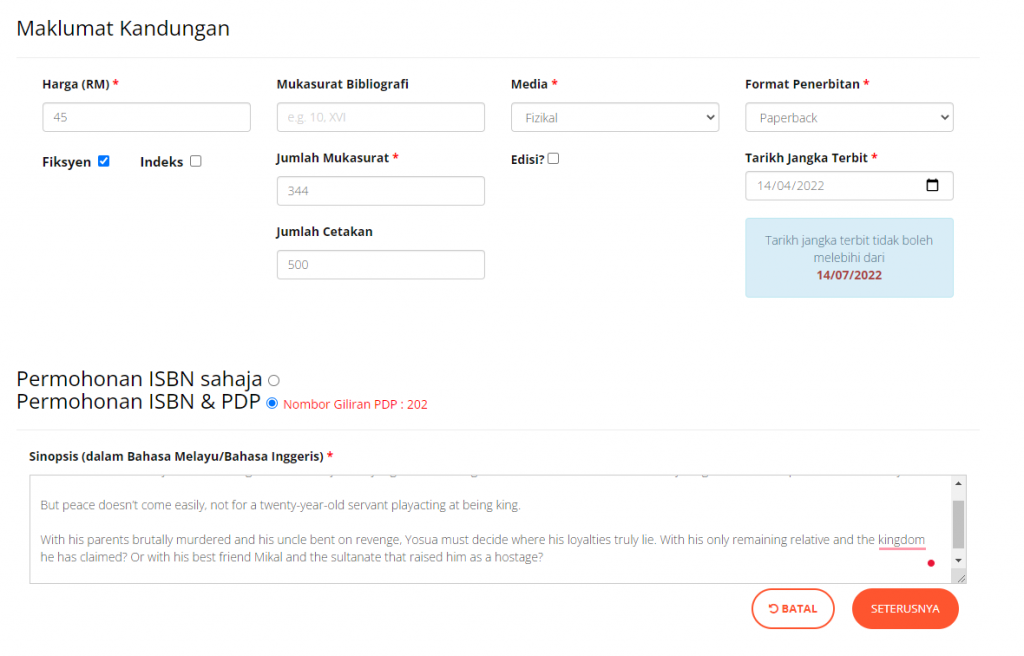
The first page is information about the book. It’s pretty much the same info you’d fill on Amazon or Google play or wherever else you sell your ebook, like:

  • Language
  • Title and subtitle, if any. If there’s a series title, you put it here too.
  • Who’s who: Besides putting the author’s name, you can add in the illustrator, editor, or whoever worked on the book.

Page 1 (first half)

  • Book details: Price, length, number of pages, format, expected publishing date, expected print run. You can change the expected publishing date later on, so that’s not a big deal – but remember that you have to submit your book within 30 days of that date. Tick if it’s fiction, and tick if you have an index.
  • If you want to have the Cataloging in Publication data (CIP/PDP), which is that thing on the copyright page saying what categories the book belongs to, you can select to apply for it here too. You’ll usually get your ISBN first, and then the CIP/PDP a few days later. This isn’t compulsory. We did it for syok purposes for the print book but didn’t bother for the ebook.
  • Synopsis: We use the back cover description here. Even if your book is in Mandarin or Tamil (or other languages), you need to have your synopsis translated to English or Malay.

Page 1 (second half)

  • The earlier screenshot is for print, so here’s an excerpt of what changes if you select digital (instead of physical) for ebook. They’ll ask you for the Platform digital, or where you’re going to sell the book. Here you can put your website or Amazon or Google Play, wherever you plan to sell the ebook. It doesn’t need to be the exact link.

Page 1 - ebook version

Page 2

Page 2 print

Page 2 is the annoying page with all the documents you need to provide. They’re the same for print & ebook, whether you want the PDP or not, so we’ll just show you the ebook version we used. The additional item that the ebook version asks for is your current draft of the book. This doesn’t need to be the final final ebook (because you need to upload that again later anyway) so even if you’re still tweaking stuff, you can do ahead and upload whatever you have.

Page 2 ebook

Okay, so the stuff we uploaded:

  1. Cover page Cpver
  2. Title page (mukasurat judul)title page
  3. Copyright page (hakcipta)copyright
  4. Synopsis/prefacesynopsis
  5. Table of Contentstoc


If you can prepare all this before you start the process of applying for the ISBN, that really really helps reduce stress levels.

Page 3

Okay, the hard part is done. Page 3 is mainly confirming that everything you uploaded is correct. If it’s not, you can hit the back button and correct stuff.

Page 3 (first half) Page 3 (second half)

AAANNNND

Page 4

is a lie because as you can see in Page 3, even though it says Langkah 3/4, the button actually says “Selesai.” And also we don’t have a screenshot, so it’s probably the “we’ll approve it in x days” page. Or maybe it takes you to the status page. Hmmm.

Anyway, we got the ISBN within like a day, and the PDP in maybe 3 days or so, even despite the notice that it may be slower than usual. The only downside of this system is that they don’t actually email you the stuff. You have to log in and check the status by yourself.

But the Status Permohonan page is pretty comprehensive, so it’s not a big deal.

Approval Dashboard

Several notes on this page:

  • Remember when you used to have to send in TWO CDs for ebooks? HAHAHA no. Now, you just click Muat Naik. Finish. Thank you.
  • If you need to delay or change your publishing date, for whatever reason, this is where you do it. Just click Kemaskini Tarikh and put in the new one. There’s probably a limit to how many times you can change it, or how long you can delay it, but if you hit any snags, just write in to them and they’ll help you fix it.
  • If you need to fix any information after you’ve submitted stuff (other than the date), the only way to do it is via e-mail. There’s no “fix” button. Depending on the situation, they’ll probably cancel your application so that you can reapply.
  • You still need to send them your 5 physical print copies.

And that’s our 2022 update!

If you want to check out the old paper version, it’s down below after the break.


Read more

Publishing on E-Sentral: A Step-by-Step Guide

Publishing on E-SentralNow that you know how to publish on Amazon, it’s time to learn how to publish on E-Sentral.

In our last post, we talked briefly about self-publishing strategies between KU (Amazon-exclusive) and Wide (primarily for the International market)—so what better way to put that into practice than to figure out how E-Sentral, the biggest e-book retailer in Malaysia, works?

We figured this also would be the best time to walk you through how to publish on E-Sentral since we’re in the midst of uploading A Still, Small Voice.


What is E-sentral?

E-Sentral is the largest e-book repository in Southeast Asia, founded by our very own Malaysians in 2011! Granted, the main market seems to be Malay and Indonesian books, including school books. Still, it doesn’t hurt to test it out since even the big international e-book distributors/aggregators tout that “we distribute to E-Sentral!” (Be proud of Malaysia, kan?)

It has 3 main bases: Malaysia, Singapore, and Indonesia. The platform itself offers a “studio” for you to craft your ebooks, but since we’re already using Scrivener to create our epubs, we didn’t take up the extra option.

Several things to note about publishing on E-Sentral before we walk you through the (very) simple steps:

  1. It doesn’t have great category options for fiction, unlike Amazon or Smashwords.
  2. It only sells books in epub format—no PDF, no html—and uses DRM so it can only be read on their dedicated e-reader (which you can download for free). This basically means you’re publishing into a closed market. That’s alright since they don’t require exclusive rights.
  3. It only accepts payment via debit or credit card—and only Malaysian cards at that, at least on the Malaysian portal. We’re assuming the Singaporean and Indonesian portals will accept credit cards from their respective countries.
  4. It has its own e-library system, similar to Overdrive.

What you need to publish on E-Sentral:

  1. Epub file
  2. Cover file
  3. ISBN

How to publish on E-Sentral

Publishing on E-Sentral is actually really, really easy. You probably don’t even need this step-by-step guide, but it’s here just in case you want to have a look before deciding if you’d like to create a publisher account. They’ve also just upgraded their interface so everything looks pretty snazzy right now!

Basic book details

Basic Book Details

1. Fill in the title of your book.

2. Fill in your author name.

3. Fill in your selling price in RM. The system will use this price to set prices in other currencies. If you don’t like the price they’ve converted it to (or you want to price differently in different markets) you can manually change it. You’ll note here that most of the currencies offered are for Southeast Asian countries. (Currency not shown in print screen: Vietnam Dong.)

4. Enter your e-ISBN. Unlike other publishing platforms, E-Sentral does not offer free ISBNs. Instead, you have to obtain your own ISBN from Perpustakaan Negara Malaysia.

5. Fill in your book synopsis/blurb.

6. Stare at the categories and laugh. Pick what best fits your book. As mentioned earlier, there aren’t many categories for fiction, unless you’re writing in “major” categories like Romance or Chick-Lit… or maybe Children.

7. Next you can choose a release date. If you don’t choose one, it will release once it’s been processed.

8. We don’t really know why they have “Language” and “Content type”, which seem to refer to the same thing, but as you can tell, E-Sentral does BM and Mandarin, which aren’t always options in, say, Amazon. We’re also not sure why “Music” is a content type, but ok.

9. The “Tag” option works, as far as we can tell, like what Amazon’s “keyword” section. Enter in all the words you’d like related to your book here. In this case, we figured it’s a great place to note that A Still, Small Voice is a short story, fairy tale, and fantasy.

10. Imprint is the “who’s publishing this” section, so we put Teaspoon Publishing in this space. If you don’t have a publishing house or if you’re self-publishing it under your own name, you can leave it blank.

Library Purchase Programme

You’ll actually need to sign an extra agreement to participate in this programme, so don’t worry if it doesn’t appear on your upload page! It’s not set to appear unless you’ve already subscribed to the library programme. This works something like Overdrive, where if you subscribe to it, the library can purchase a copy of your book to lend to their patrons. As you can see, you can set a special price for libraries, whether higher or lower than your normal selling price.
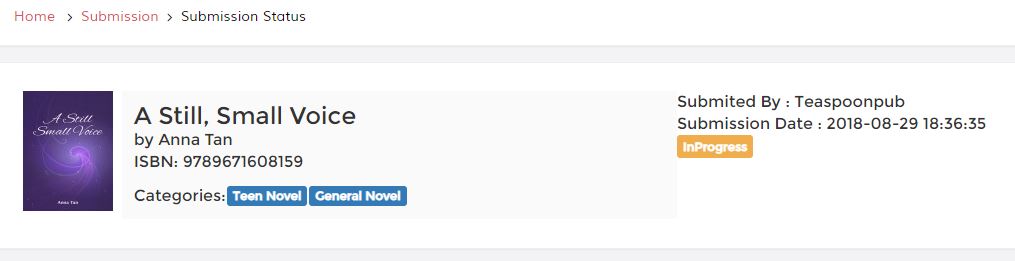
Uploading your books

The final step is to upload your epub file and your cover file. It’s a drag and drop function, so that’s fairly easy.

Several things to note about uploading:

  1. Although the upload e-book box says it accepts files up to 100 MB, it often hangs if the file is more than 2MB. So try to get the smallest sized file possible!
  2. If this doesn’t work, try using the bulk upload option.
  3. All the other platforms I’ve seen will provide an automatic preview file (usually 10% – 20% of the ebook). E-Sentral doesn’t. If you want to provide a preview (or Look Inside as Amazon puts it), you’ll have to create a separate epub with the exact amount of content that you want your potential readers to see.

Once you click submit, it will tell you that your submission has been uploaded, or it will give you a warning if there’s anything missing or wrong.

If you’re the kin cheong type, you can check on the status under the “submission status” tab.

That’s basically it!

We’re pretty sure you have two questions now:

  1. How do I create an epub?
  2. How do I get an e-ISBN?

We’ll cover that soon!